// one editor, four kinds of board
Protoboard Editor
Plan a circuit on the board you will really solder: stripboard, dot board, tripad board or a breadboard-style PCB. Draw the schematic once. Then place the parts by hand, with every net in its own colour, or let auto-layout place them and lay the cuts or solder runs for you.
Browser-only version. Your projects stay in this browser on this device. Use Export in the editor to keep a backup file. Self-host the editor for accounts, share links and a parts library.
This fork is young and still grows. New board features land often.
start on a board
Each card opens a new project on that board. You can change the kind later in the editor.
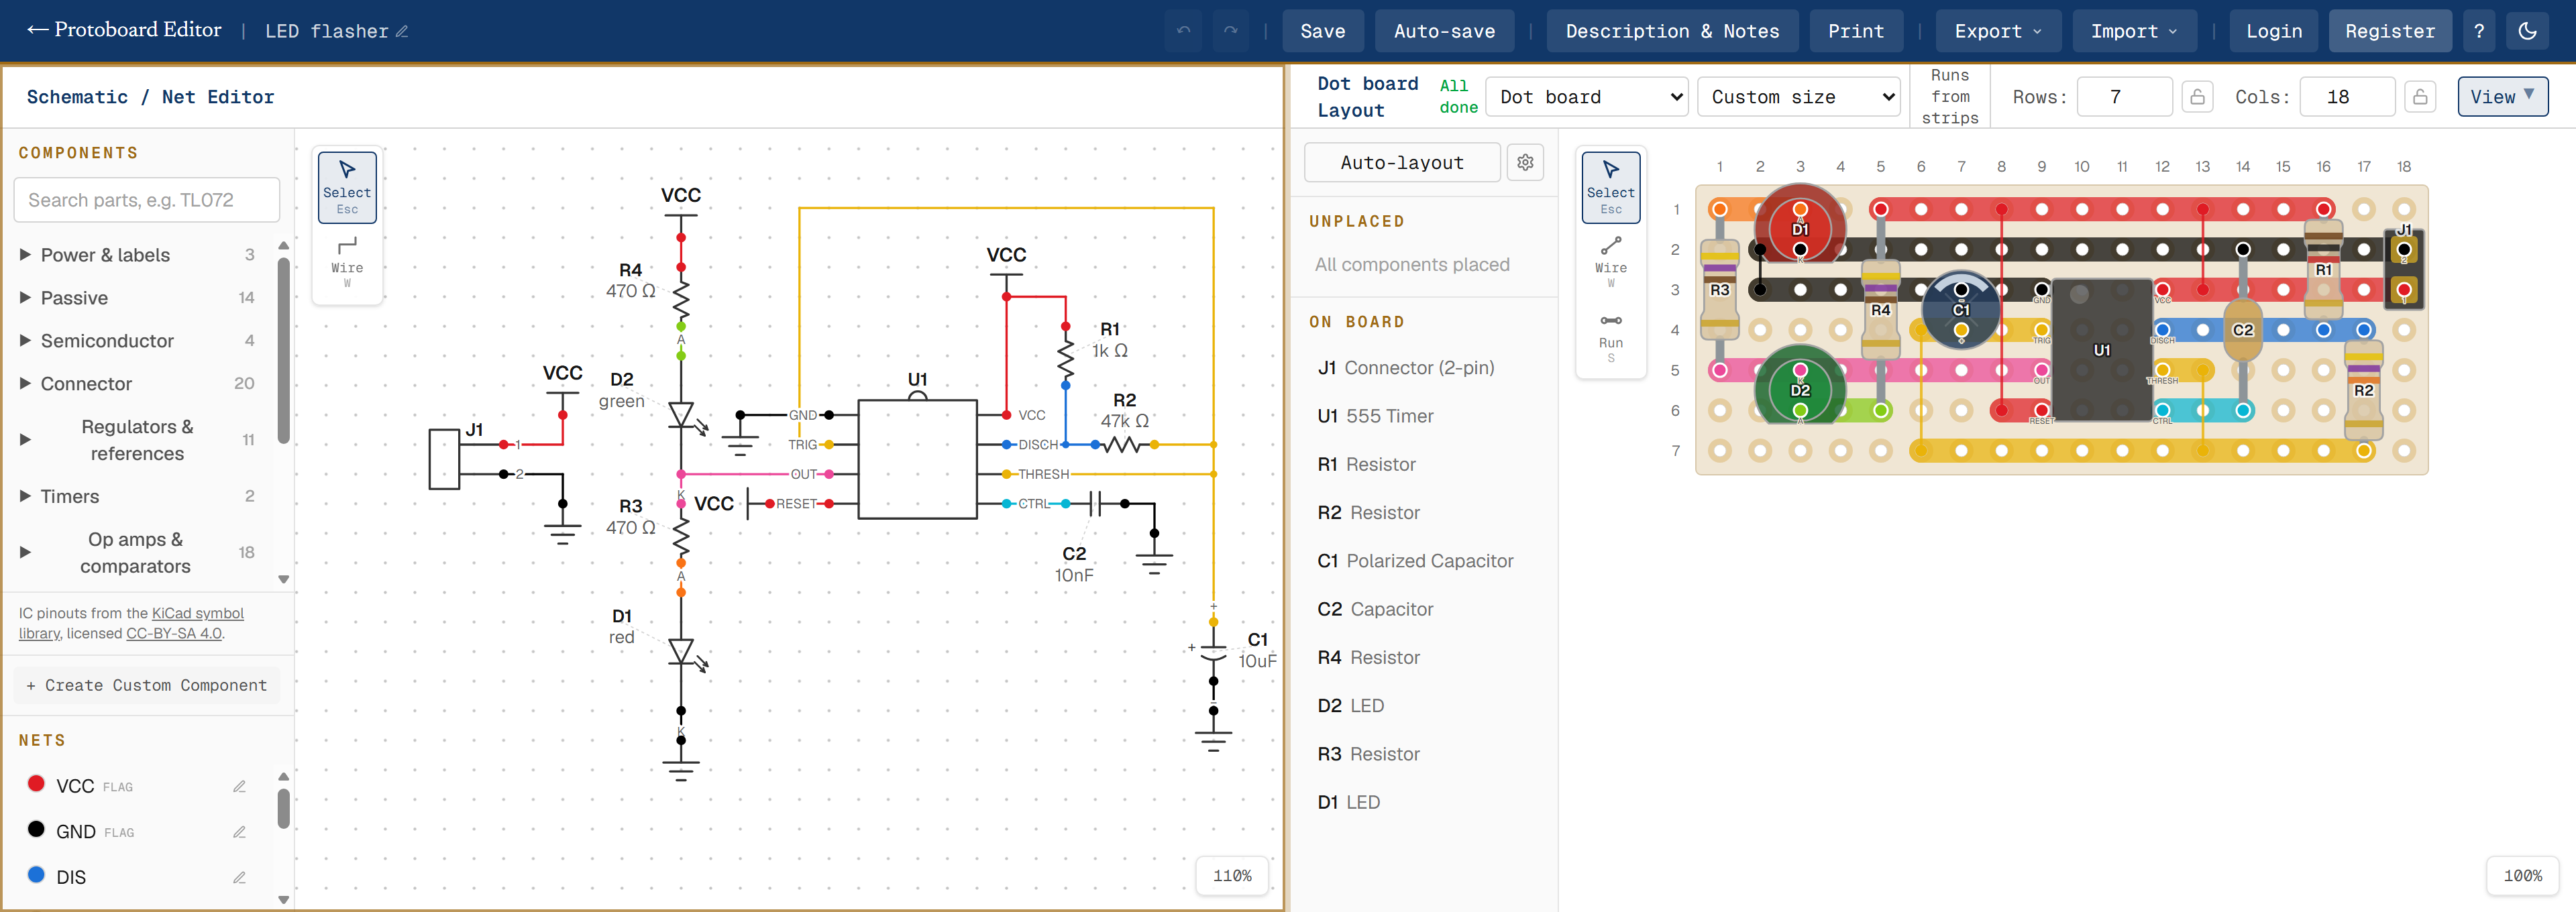
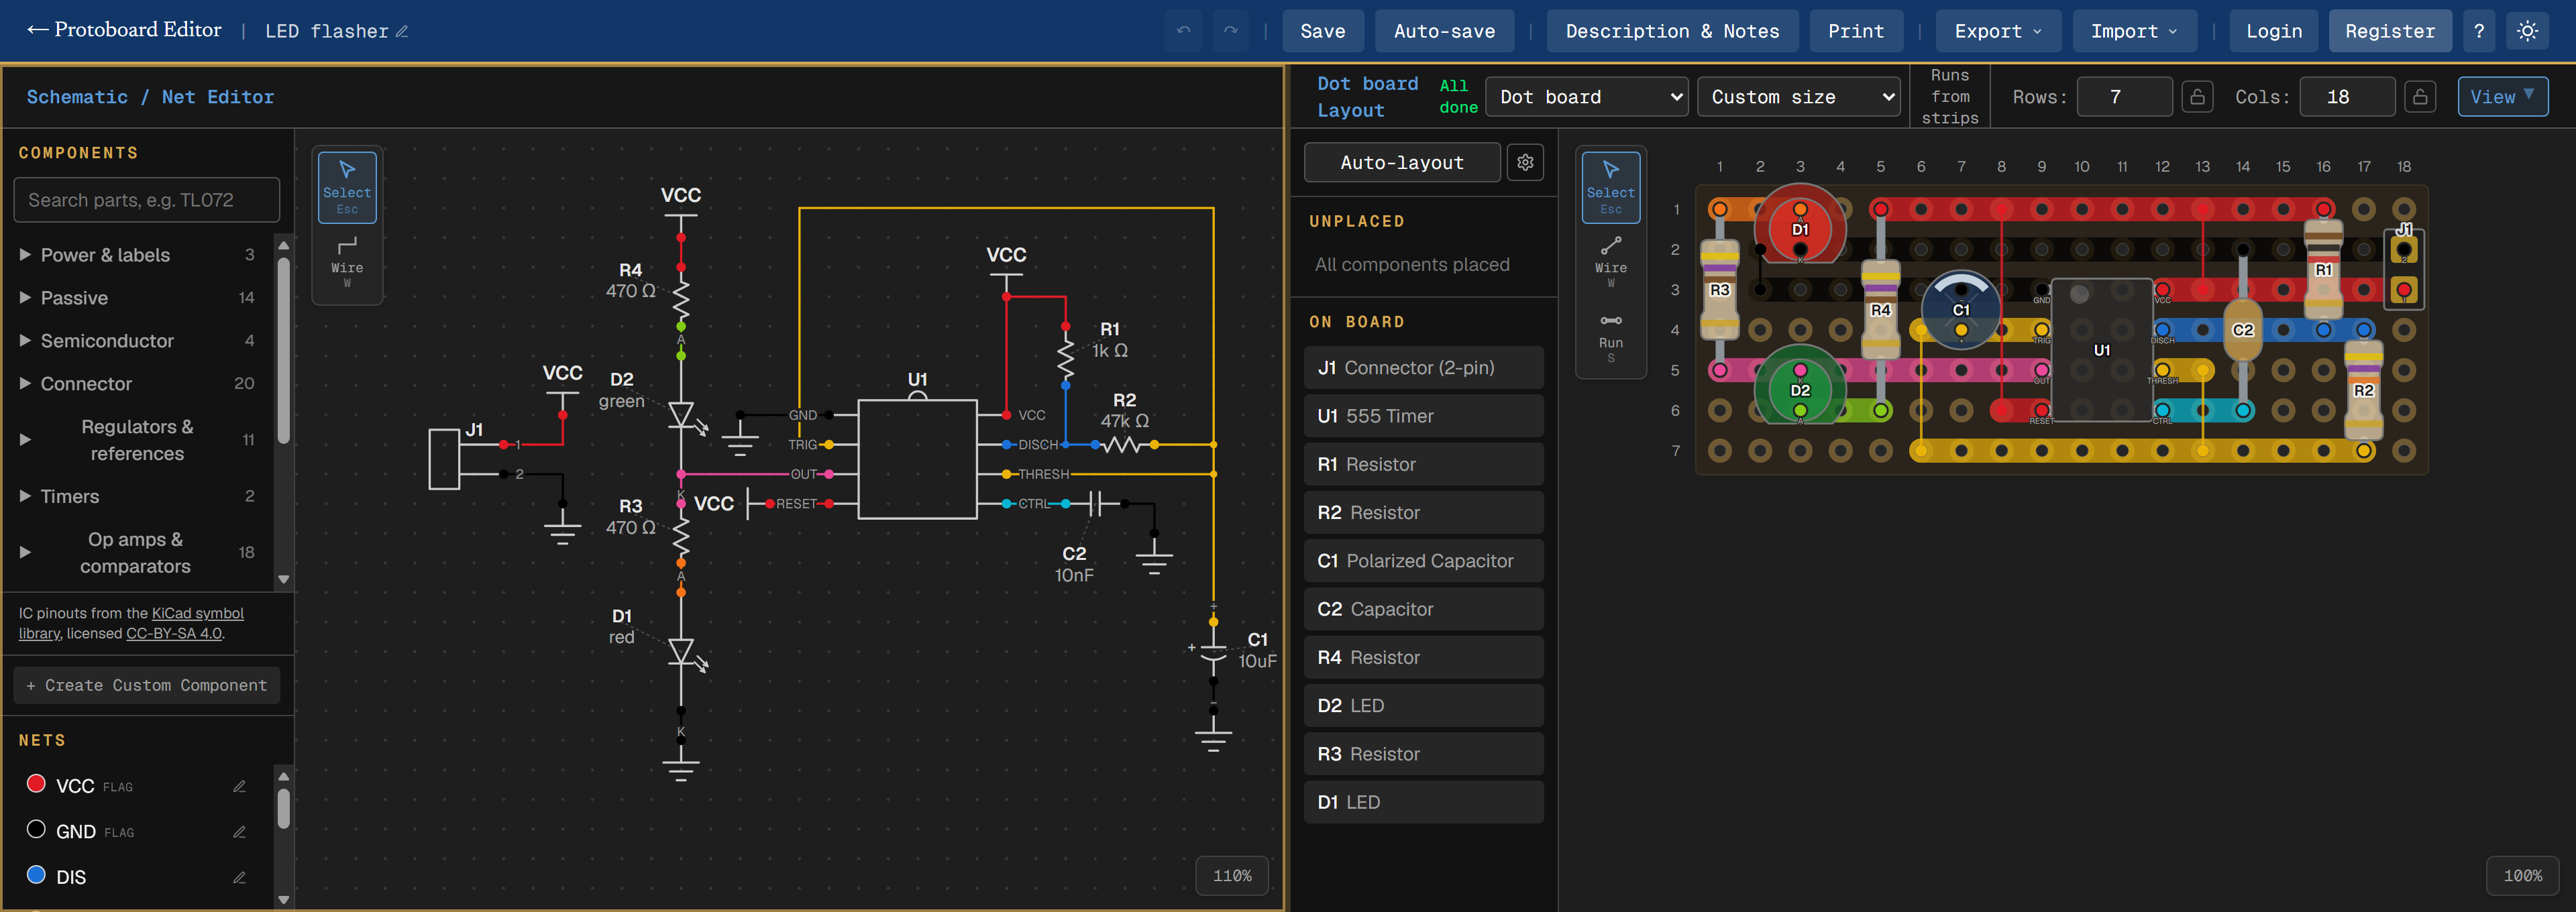
from idea to board
- 1
Draw
Build the schematic from the symbol library or your own parts. The wires make the nets.
- 2
Choose the board
Pick the kind of board on your bench and its size. Presets cover the common perfboard sizes.
- 3
Lay it out
Drag the parts onto the board. Every net gets its own colour, and a short or an open connection shows at once.
or auto-layoutOn stripboard and dot board the router places every part and lays the cuts or solder runs. How it works →
- 4
Print and solder
Print the 1:1 sheets, push the parts through the paper, then follow the cut or run sheet.
or go to PCBWhen the prototype works, export a KiCad netlist and draw the real PCB.
what you get
Design
- Schematic editor with a standard symbol library and automatic net detection
- IC pinouts from the KiCad symbol library, plus your own custom parts
- Parts drawn as real packages at true size: choose the body you have
- Editable footprints and flexible leads for passives
Lay out
- Four board kinds: stripboard, dot board, tripad board, breadboard PCB
- Auto-layout for stripboard and dot board: placement, board size, cuts and runs
- Lock the board size or single parts, and the router works around them
- Off-board parts such as pots and jacks get pads or a connector
Build and share
- 1:1 print: placement sheet, mirrored cut or run sheet, parts list
- KiCad-compatible netlist export
- JSON export and import, full undo history
- Edit and view-only links when you host it yourself
print and build
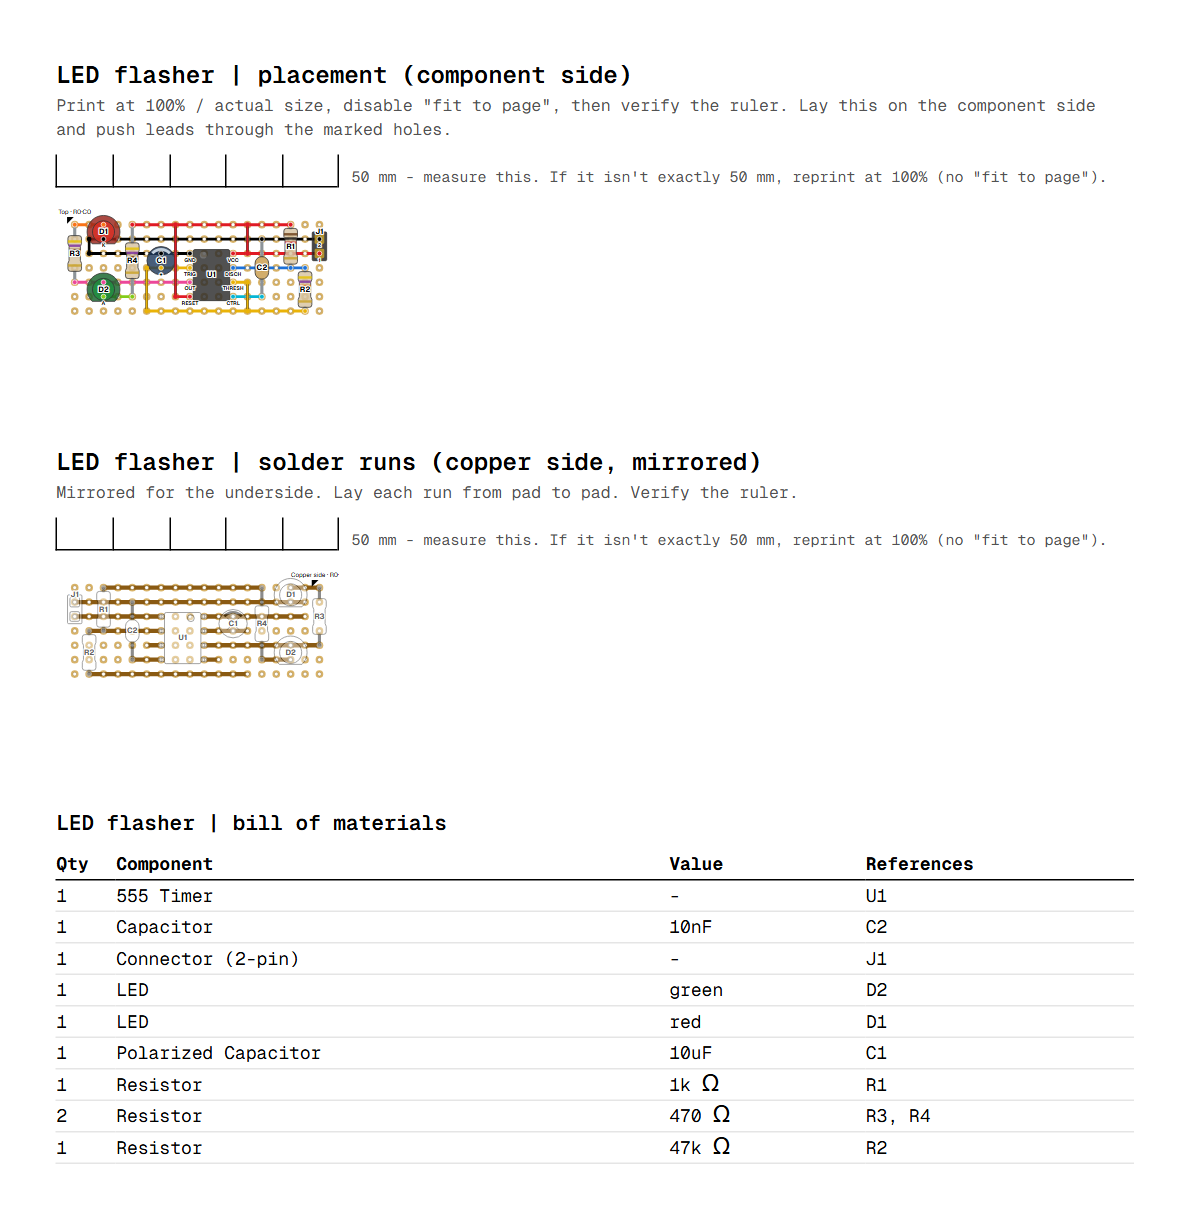
placement sheet on top, the solder-run sheet mirrored for the copper side, then the parts list.
Your Projects
No projects yet. Create one above.